I am always happy to learn a faster more ergonomic/efficient way to approach the various tasks related to weaving.
About 18 months or so ago I was visiting with Syne Mitchell and as we chatted she was sleying the reed on her loom. She was doing something completely different than I’d seen anyone else do so I asked her about it. She said she had learned the method from Peggy Ostercamp (a long time student of Jim Ahrens.)
What blew me away was that it was almost identical to the way I had been threading in terms of using minute hand movements and dealing with multiple ends at the same time. How come I never twigged that the reed could be sleyed the same way????
As soon as I got home I started practising the new (to me) method of sleying and have been happily using this method ever since. It took about 6 warps before I could accurately sley the reed. It was well worth taking the time to learn this method.
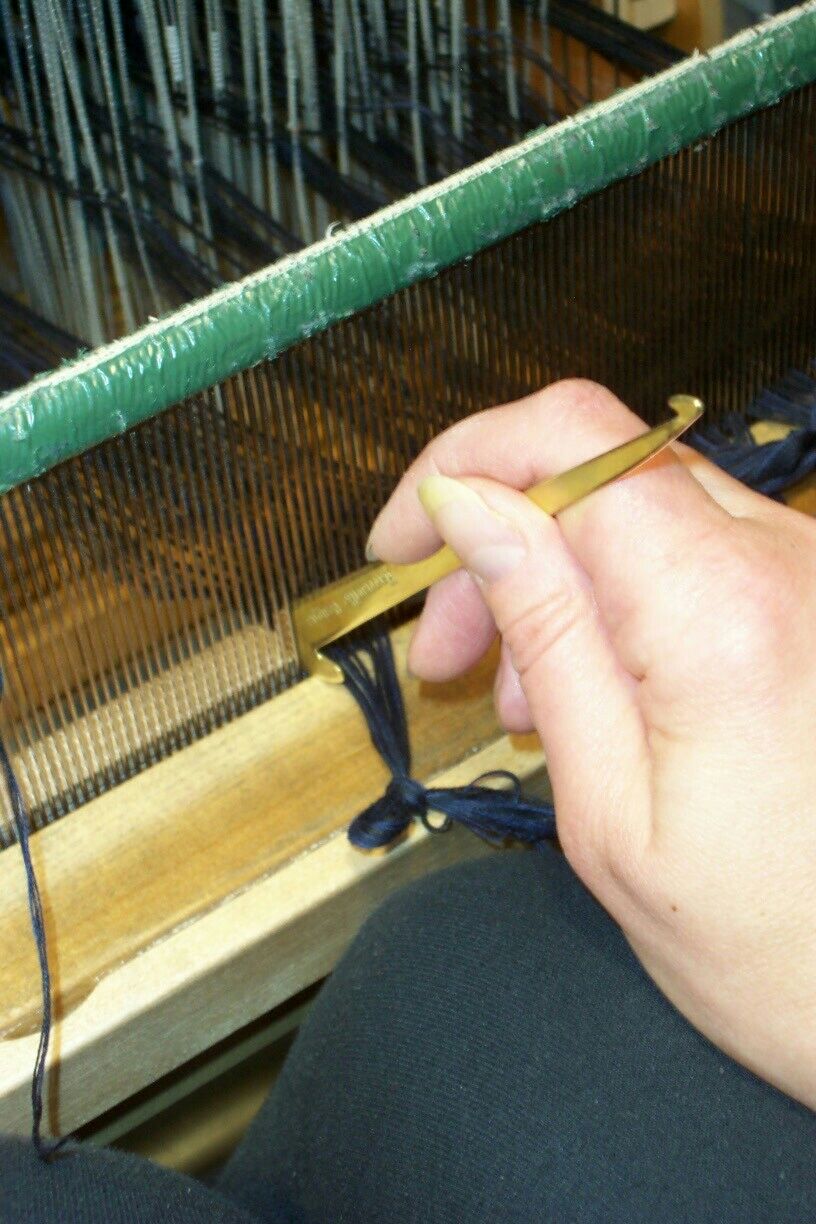
I use Harrisville’s brass threading/sleying hook. For threading I use the small hook, but for sleying it gets turned over and the large hook is used. Notice the orientation of the hook – it’s downwards, not up. It is being held as one would hold a pen.
I begin by finding the next dent I want to fill by inserting the hook into that dent near the bottom of the reed (so that I can more easily identify the correct dent by lining the hook up with the last dent filled.)
The hook is then inserted into the reed and lifted to about the half way point in the reed.
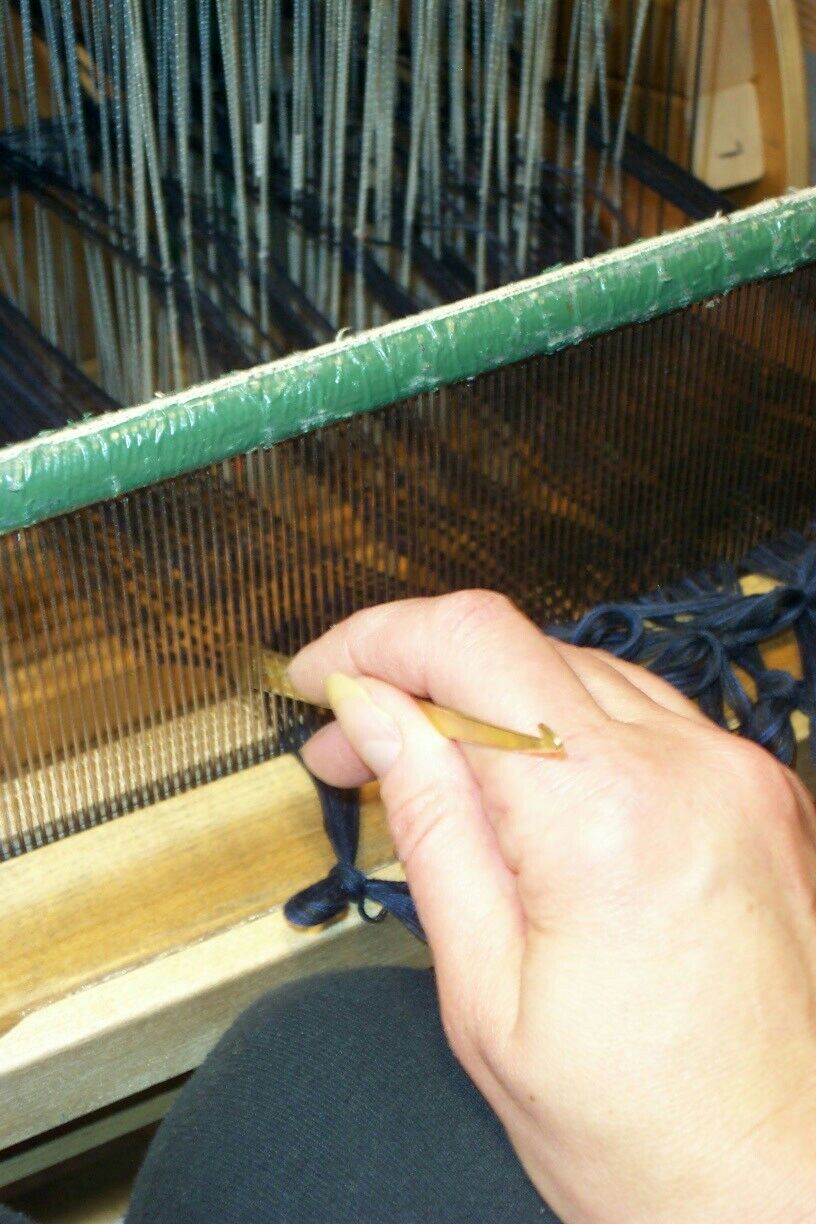 Here I am inserting and beginning to slide the hook upwards. I then reach for the group of ends desired and pull the loop through the dent as shown below. The entire loop is not drawn through, but left on the stem of the hook.
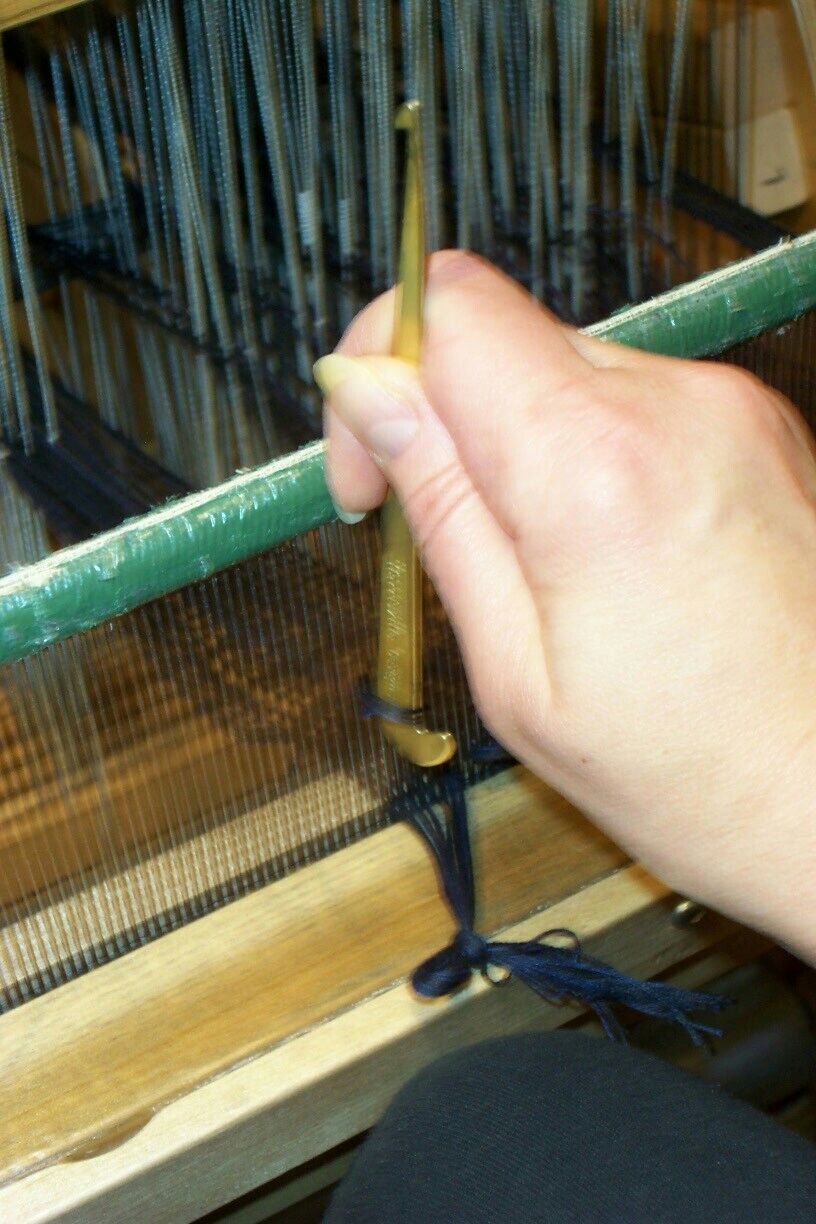 Using the hook as a sort of auto-denter, I leave the loop on the hook and slide it over the spline and re-insert it into the next dent to be filled. The next group of ends is then caught on the hook and pulled through to the front.
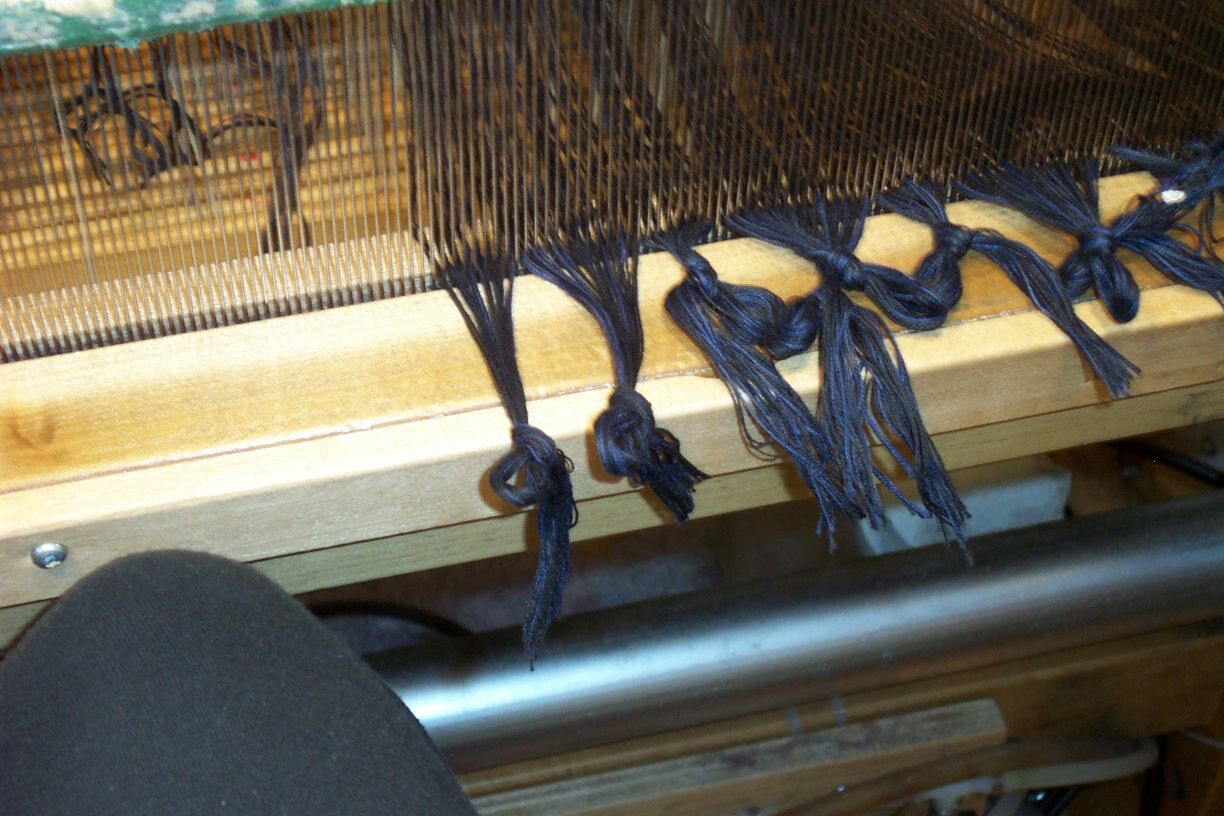 The groups are tied with a slip knot in amounts suitable for tying onto the apron rod.